How to Set Up Excise Tax Data for New Products with Variants
1. Create Your Product
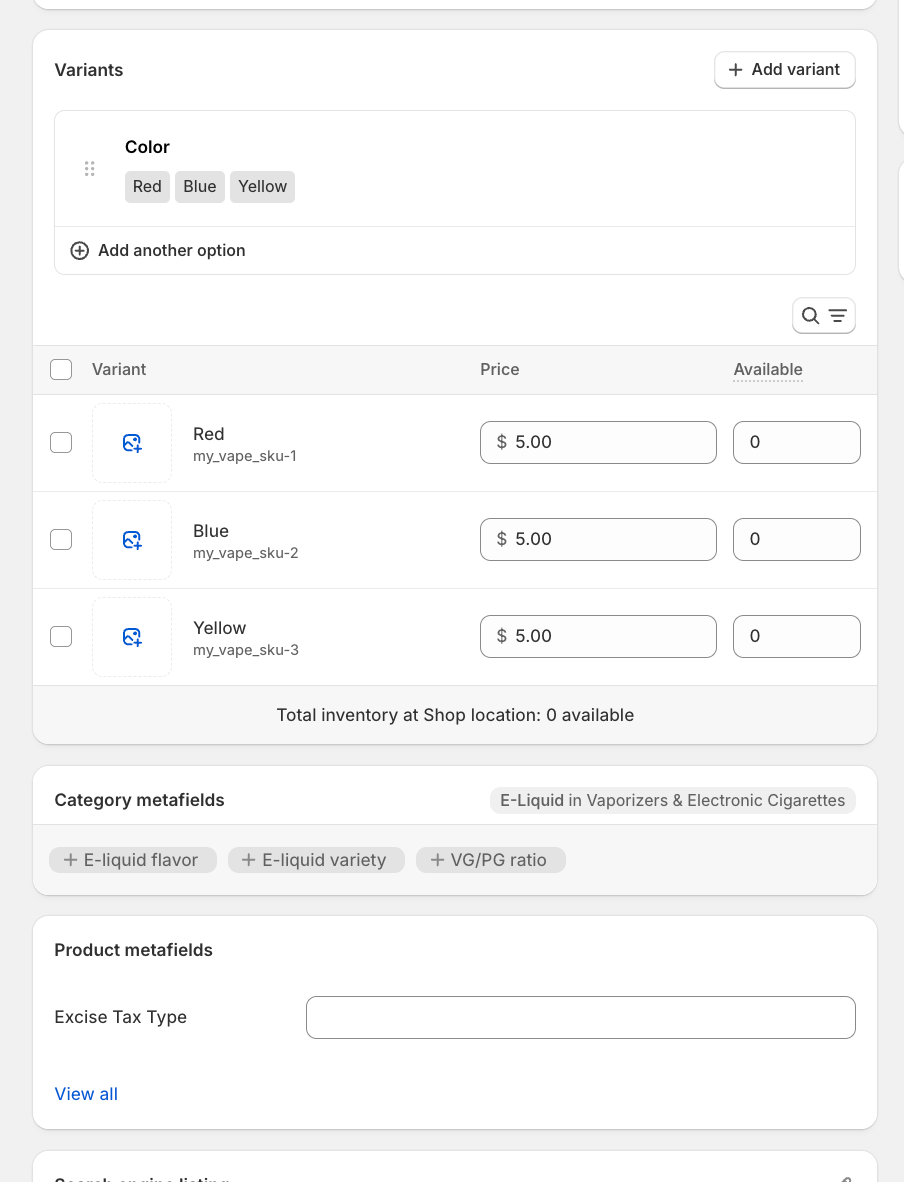
Create your Shopify product as you normally would. You can set your pricing, add variants (such as color options), and configure standard product details.
2. Select the Tax Type
Once the product is created, scroll down to the Product metafields section.
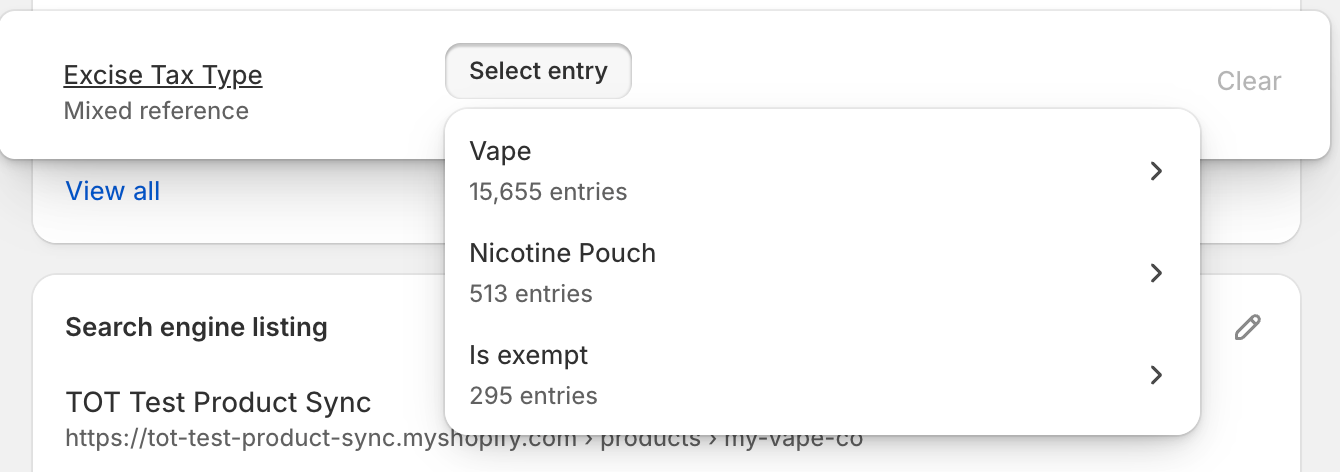
- Click the blank field next to Excise Tax Type.
- Select the appropriate category from the list:
- Vape (for vape products)
- Nicotine Pouch (for nicotine pouches)
- Is exempt (if the product does not require excise tax info)
Note: The fields you need to fill out will change based on the category you select (e.g., liquid volume is required for vapes but not for pouches).
3. Create a New Entry
After selecting your category (e.g., "Vape"), a list of existing entries may appear.
Important: You must click ( + ) Add new entry at the bottom of this list.
Do not select an existing number from the list. Those entries are linked to other products. You must create a new entry to ensure your new product is not incorrectly connected to a different product's data.

4. Configure Product Details
A form will appear for you to input the specific tax and product data. Fill out the required fields for your product type.
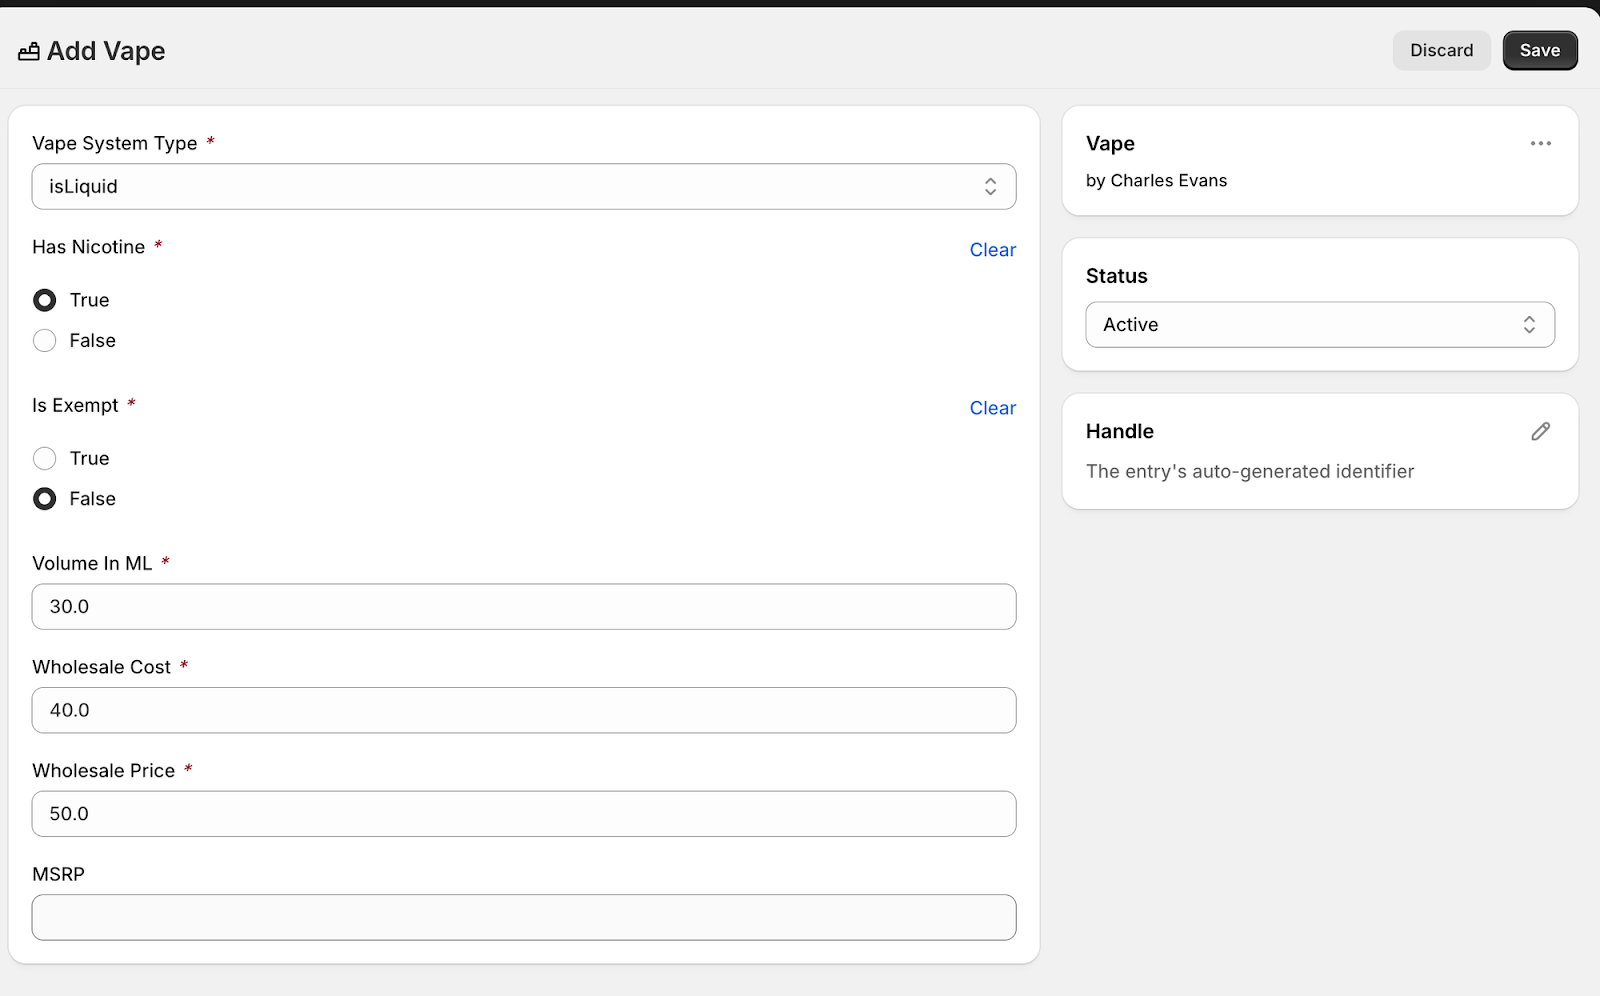
Field Guidelines:
- MSRP: This is optional. If left blank, the system will default to the price set in your Shopify product variants.
- Status: You can leave this field as is.
- Handle: Do not edit this field. The system automatically renames this to an internal ID to ensure the product syncs correctly.
5. Save Your Changes
To finish, you must save the data in two locations:
- Click Save at the top right of the metaobject entry form.
- Click Save at the top center of the main product page.
Once saved, your product and its variants will automatically sync to Token of Trust.
- Metafields Present:
- Product-level:
Excise Tax Type - Variant-level:
Excise Tax Type
- Product-level:
- Rule:
- Never fill out the variant metafield.
- Always use the product metafield when both are visible.
- Guideline:
- If a product has only a single default variant (or no variants), ignore the variant metafield completely and rely solely on the product-level metafield.