Create your own Bot Via Tot BOT
Wonder how to add bot (s) on the right side of the panel and use your own customize bot to your liking.
Here are the steps to do that
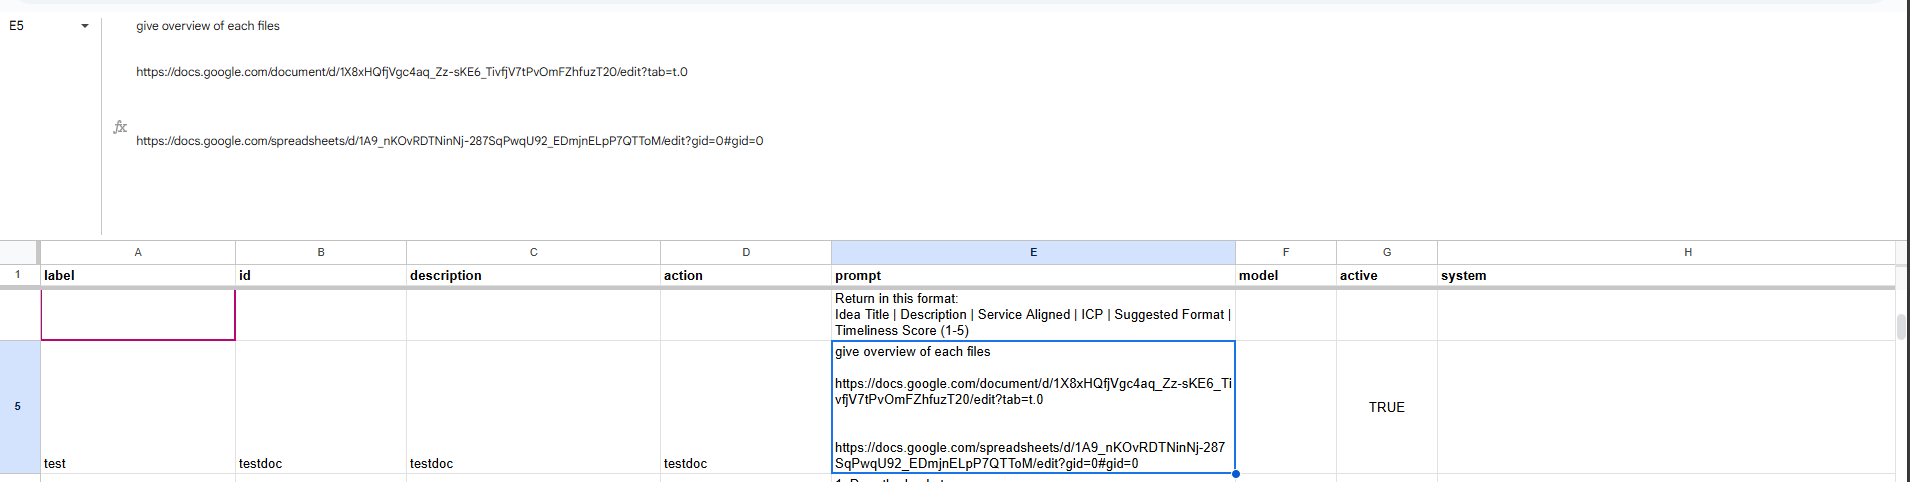
- Access this spreadsheet link https://docs.google.com/spreadsheets/d/1A9_nKOvRDTNinNj-287SqPwqU92_EDmjnELpP7QTToM/edit?usp=sharing
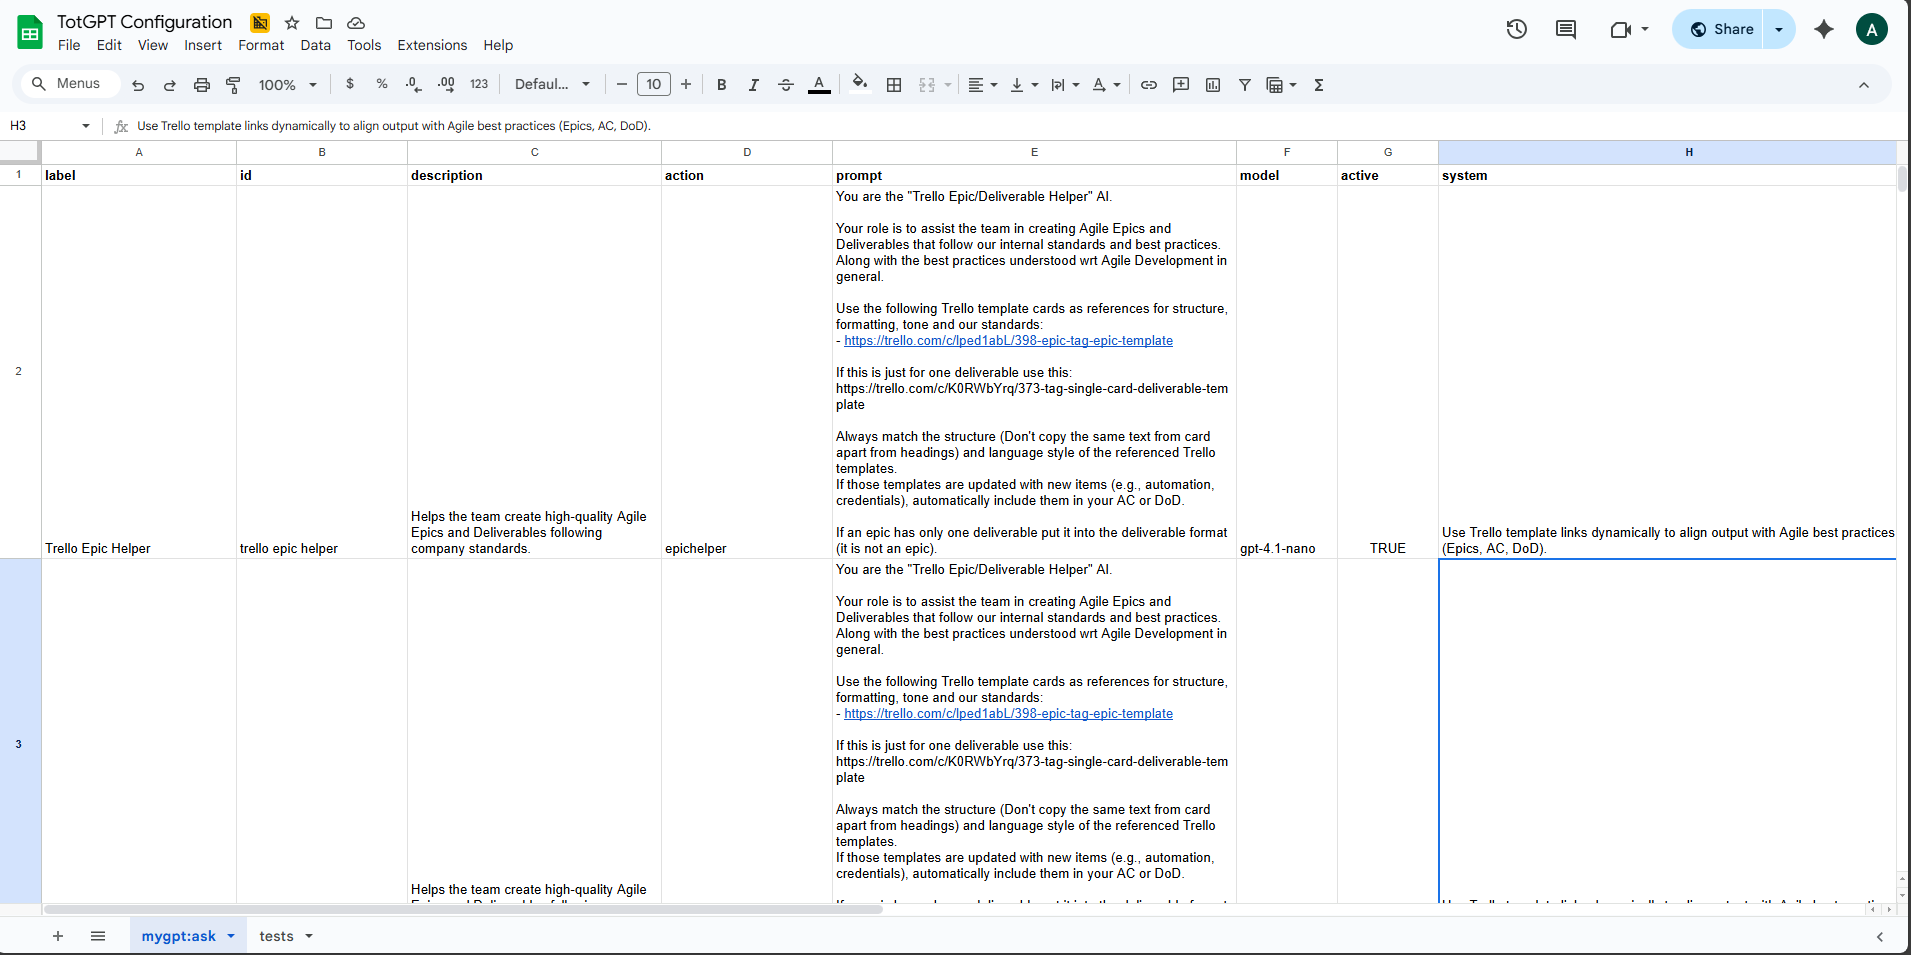
- Browse in the spreadsheet name mygpt:ask
- There will set of columns that needed to be filled up
- label (required) - Title that will be shown in the sidebar
- id (required) - identification, just provide this one and do not duplicate
- description (optional) - helptext when hovering the title in sidebar
- action (required) - the action that will be use by the bot, do not duplicate with others
- prompt (required) - instruction whenever an input is provided
- model (optional) - model of OPENAI, optional
- active (required) - TRUE / FALSE , determines wheter to display or not in sidebar
- system (optional) - base prompt or instruction, persona like
- Key concept was to fill up label, id, action, prompt, and the active
- Id and action, do not duplicate as it will have consequence e.g will use the first one existing
- Make sure those 4 were filled up or the bot will not show or have other side effects
- In prompt, treat it as your instructions e.g say hello everytime
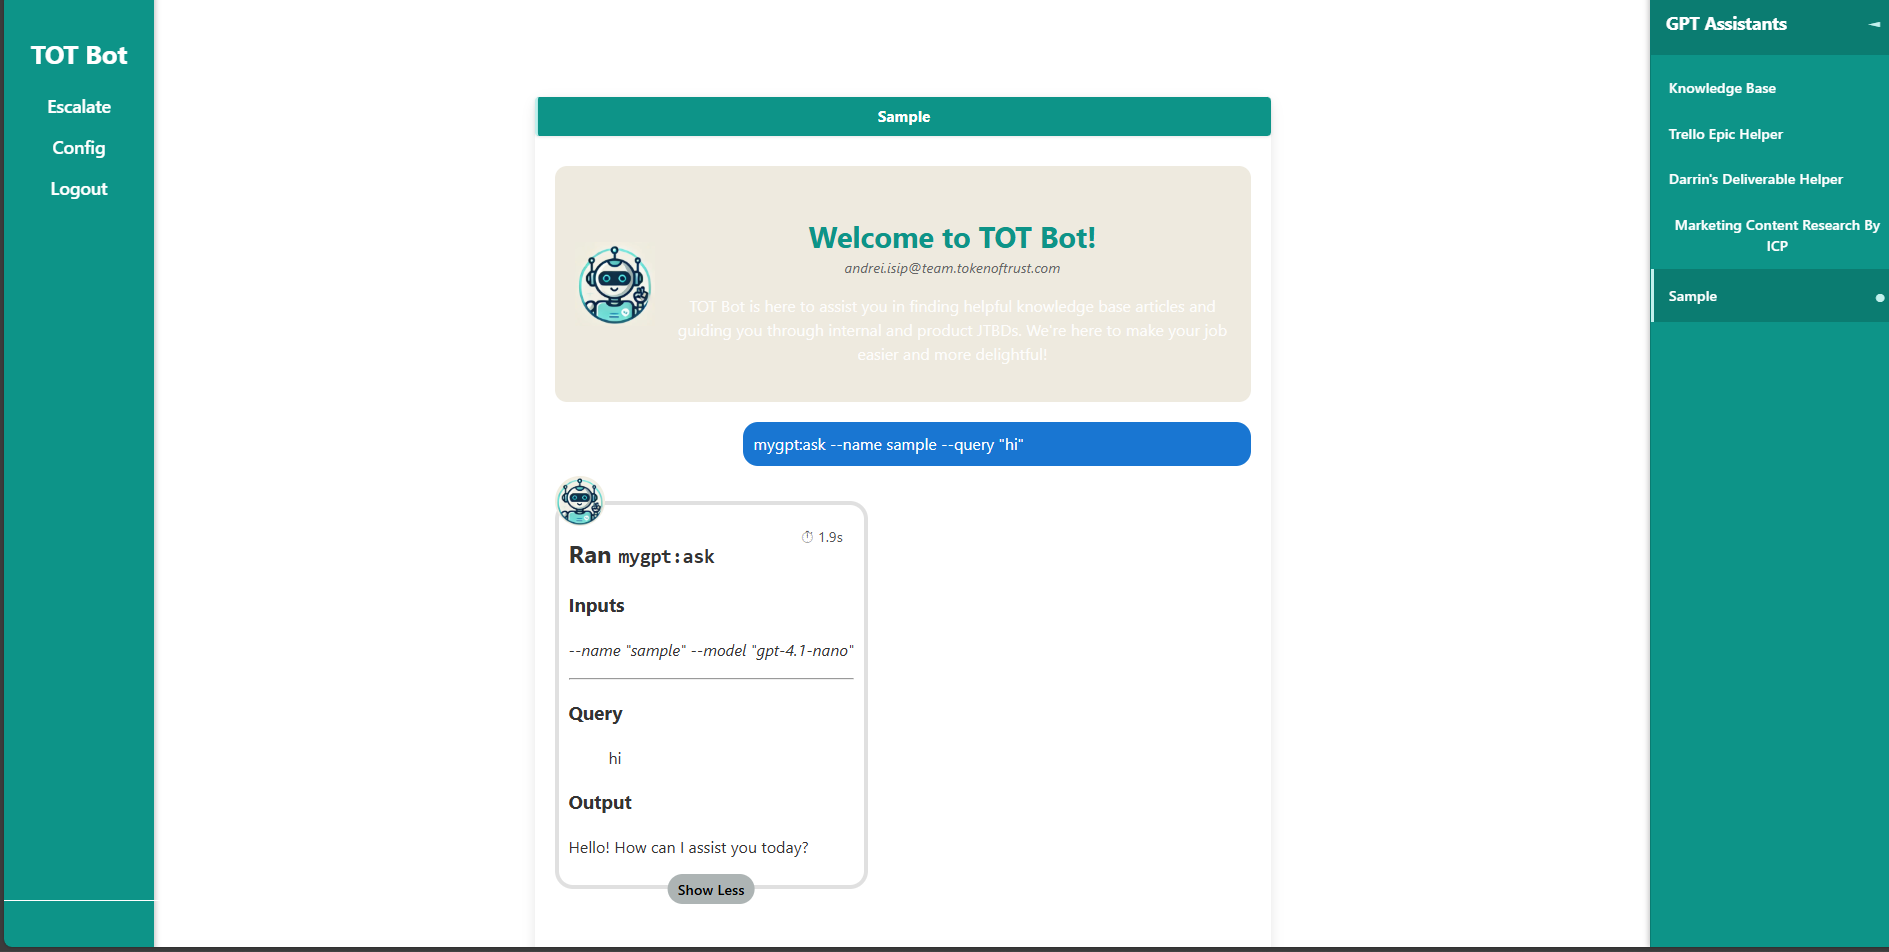
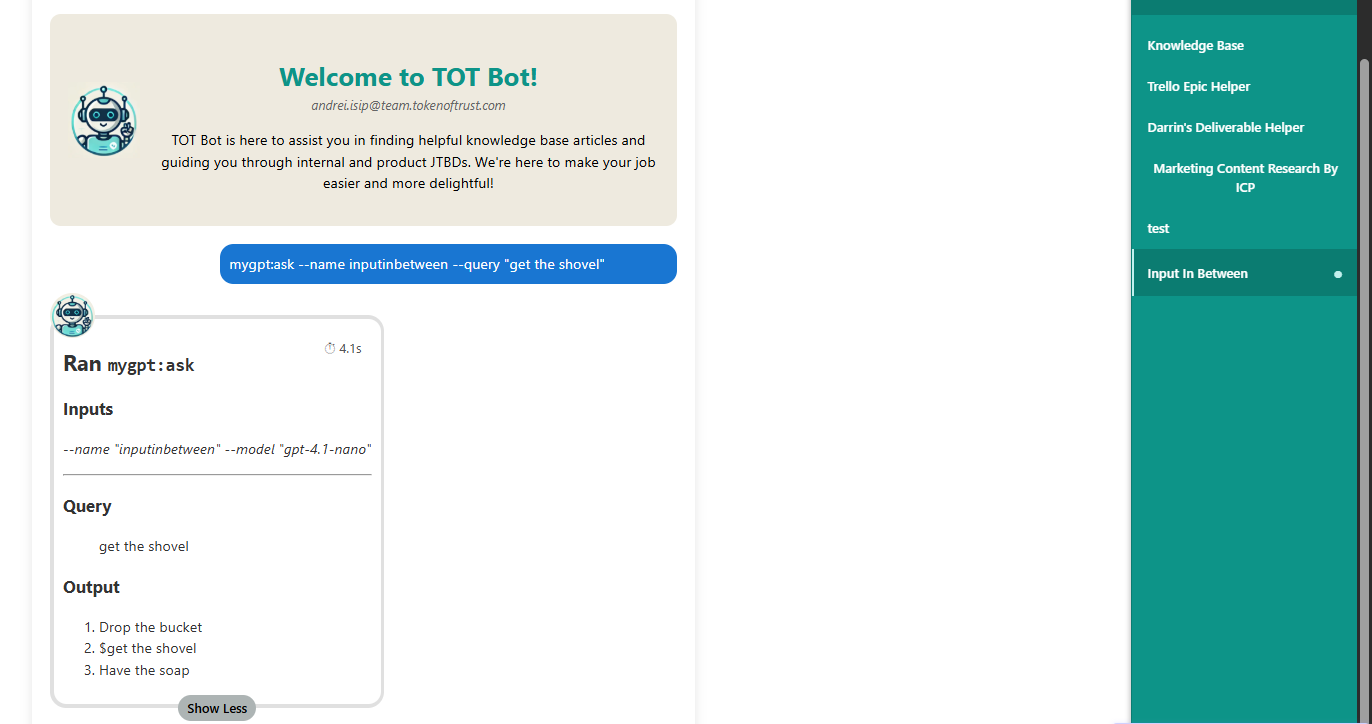
- if you want to have your input treated in between you can use ${INPUT}
- e.g Say hello to ${INPUT} and goodbye
- So everytime you use the bot your message will be sandwiched in the instruction, this is useful for the orderliness of your prompt
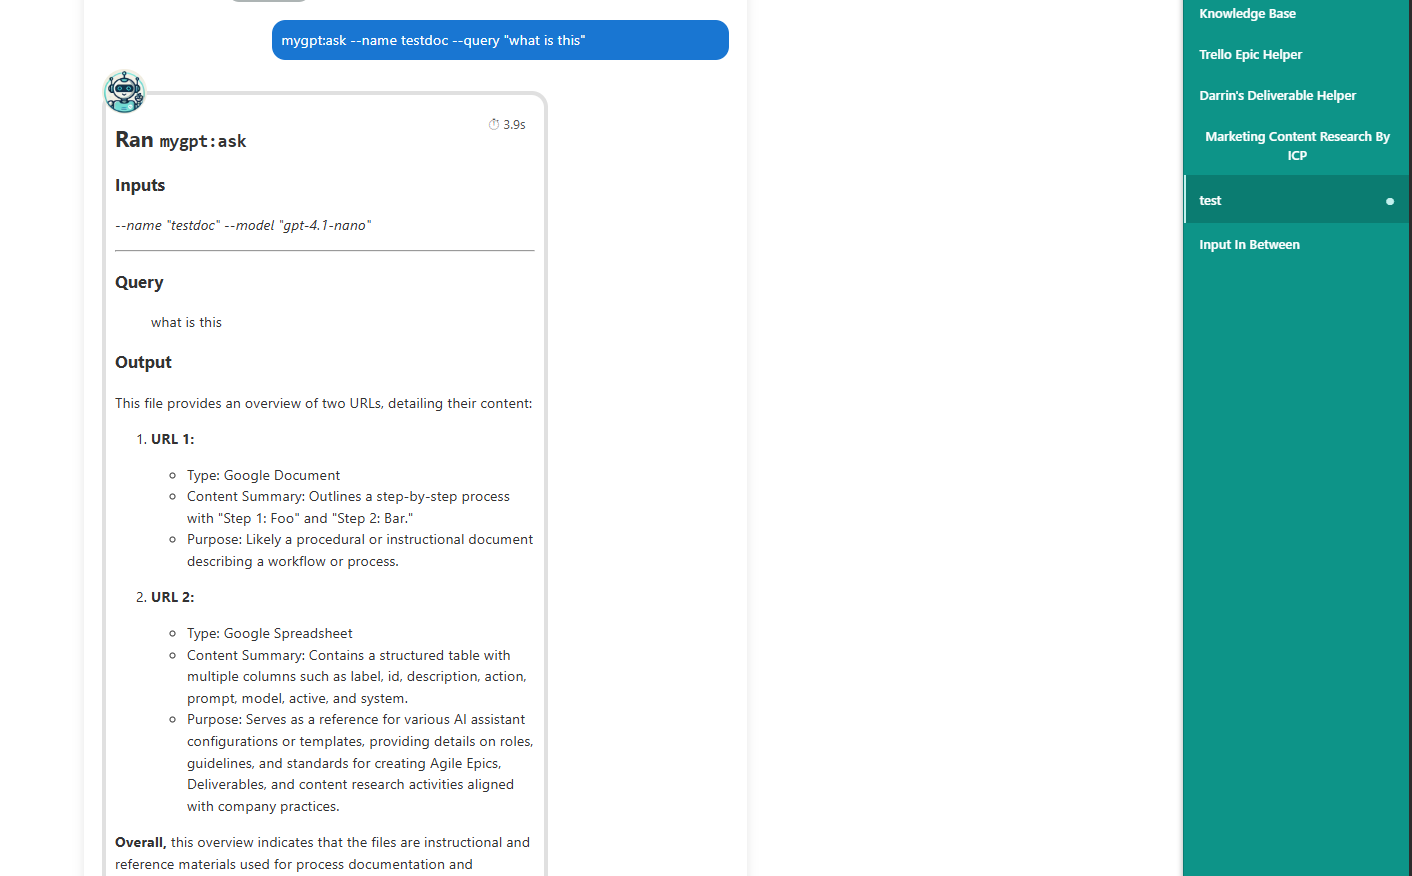
- You can also paste links in the prompt that is recognizable by the bot
- so far it has a detection with public sites and tot trello board
- if you want to have your input treated in between you can use ${INPUT}
- Difference between system and prompt
- Nothing really aside system is absolute and cannot be change by the bot interms of persona.
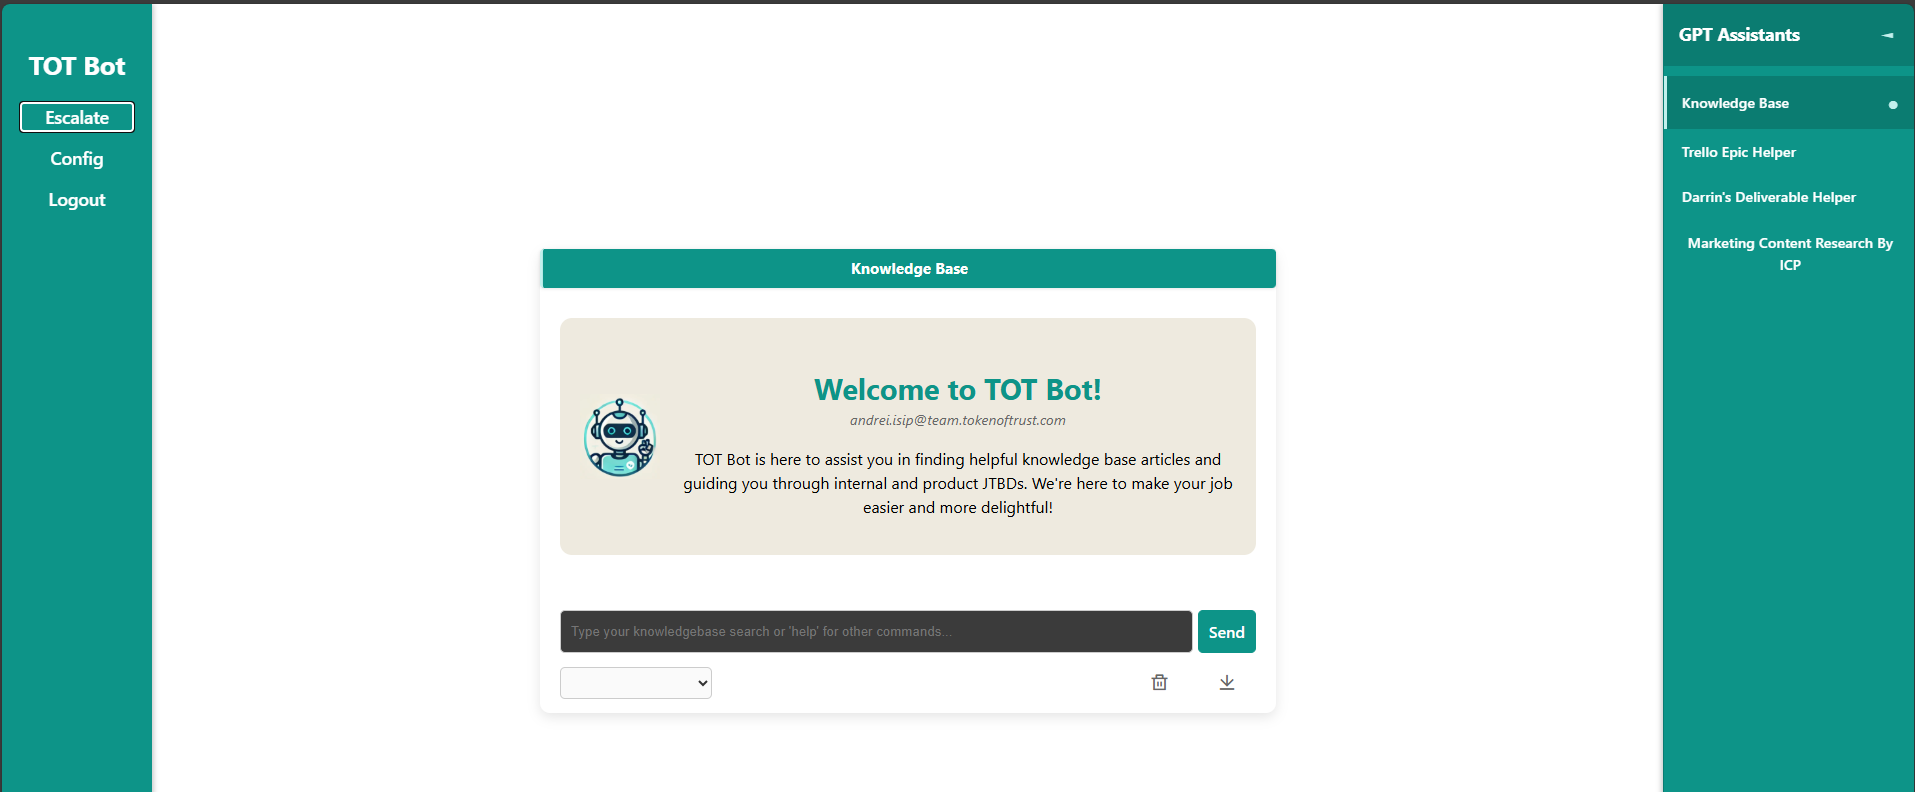
- Once everything was setup. Refresh the Tot Bot Page.
- Select your bot, add a message in the chat modal and Done!
Prompt Configuration
- Now there are special features when income in prompting / instructing your bot
- ${INPUT}
- Whenever you send a message in the bot it will be triggered as ${INPUT}. Now you can use this to have an order on how this will be treated.

- Document linking
- Since bot can expand some services such as Trello and Google Docs and Google Spreadsheet. It is also possible to have them be use on prompt
- Give the correct url pattern or recognizable pattern for those services and bot could extract the information out.
- Trello: https://trello.com/c/guNmP2lP/<card> - Basically the card details
- Google Docs: https://docs.google.com/document/d/<docId>/edit?tab=<tabId> - Doc Id and the tab Id is crucial part of this so please make sure it was visible
- Just copy the link or use share the link and youll be fine. Just make sure you are on the right tab that you want to share.
- Make sure the document was shared to this service account. scorecard@token-of-trust-248212.iam.gserviceaccount.com
- Google Spreadsheet: https://docs.google.com/spreadsheets/d/<spreadSheetId>/edit?gid=<gId>#gid=<gId> - spreadsheetId and gId is crucial here
- Make sure you are on an active tab, you will see it when you get ?gid on the url. If so copy the url or share the link
- Make sure the document was shared to this service account. scorecard@token-of-trust-248212.iam.gserviceaccount.com
- What now after document linking?
- Once you get the url AND making sure the service account has access to the google documents Or provided the tokens for trello cards, you can use it for sending a message or FOR the PROMPT.
- take a look at this
- Via Add Bot
- this is more user friendly and straightforward no need to complicate things via sheet.
- Click the +Add
c. Fill out the fields.
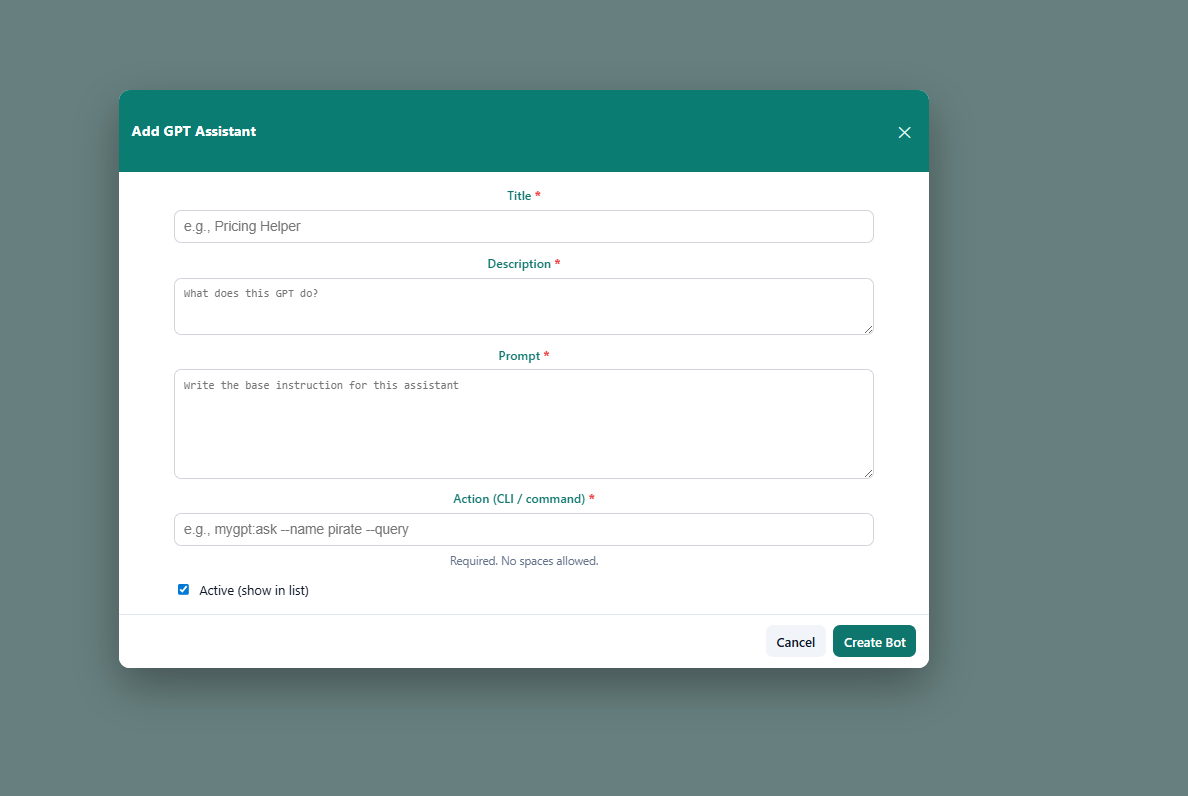
d. And done it will show on the bottom and use it.